Welding Inspection Services Perth
Welding Inspection Perth
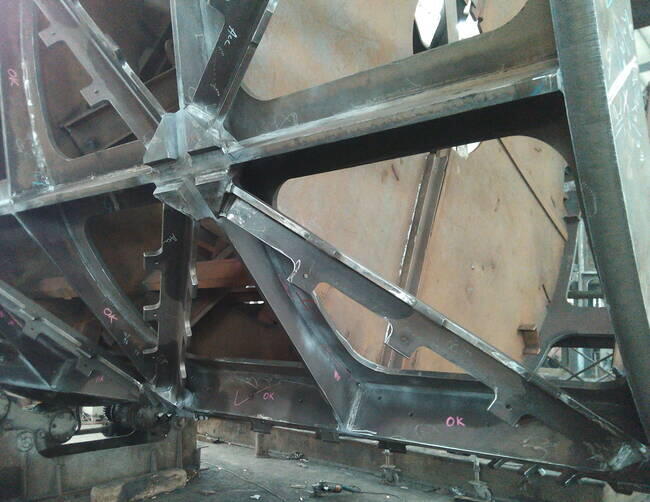
Elite Engineering WA provides professional welding inspection services throughout Perth and regional Western Australia, utilizing certified AS1796 Cert 10 and AS2214 welding supervisors who not only conduct thorough visual inspections but also provide expert guidance on defect repair and corrective actions.
Welding inspection is critical quality assurance that verifies welds meet Australian Standards (AS1554, AS2214, AS3992), project specifications, and client requirements. For Perth's mining, oil & gas, and construction sectors—where welded structures and equipment face extreme loads, fatigue cycles, and harsh operating conditions—comprehensive inspection is essential for preventing catastrophic failures and ensuring long-term structural integrity.
Our inspection services cover the complete spectrum from initial welding procedure review through final acceptance testing. We verify that fabrication work is performed by qualified welders using approved procedures, coordinate Non-Destructive Testing (NDT) with NATA-accredited laboratories, compile comprehensive inspection records for MDR documentation, and provide technical expertise to resolve quality issues before they impact project schedules or safety.

AS1796 & AS2214 Certified Welding Inspectors
Elite Engineering WA's Perth-based inspection team holds current AS1796 Certificate 10 (Welding Inspector) and AS2214 (Welding Supervisor) certifications—the highest level of welding supervision qualification recognized in Australia. These certifications require comprehensive knowledge of Australian welding standards, metallurgy, welding procedures, Non-Destructive Testing methods, and quality systems.
Our certified inspectors provide technical authority that satisfies client requirements, regulatory audits, and third-party verification across Perth's mining, oil & gas, and construction sectors. Whether your project is based in Kwinana Industrial Area, Malaga's manufacturing precinct, or regional WA mining sites, our inspectors bring the expertise to identify defects, assess acceptability, and recommend corrective actions.
What Our Certified Inspectors Do
- Pre-Welding Verification: Review welding procedures (WPS/PQR), verify welder qualifications are current and applicable, check material certificates match specifications, and confirm joint preparation meets standards
- During-Welding Monitoring: Verify welding parameters (voltage, amperage, travel speed, heat input), monitor interpass temperatures, check tack weld quality, and ensure proper electrode/wire storage and handling
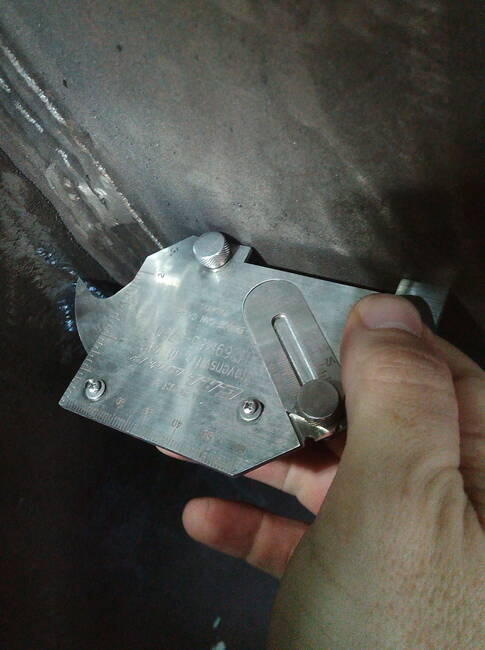
- Post-Welding Inspection: Perform comprehensive visual inspection per AS2214, measure weld dimensions (throat thickness, leg length, reinforcement), assess surface finish, and document all findings with photographs and dimensional records
- Defect Assessment: Identify and classify defects per AS1554 acceptance criteria, determine root causes (procedure issues, technique problems, material incompatibility), recommend repair methods, and verify repairs meet acceptance standards
- Documentation & Reporting: Compile inspection records for MDR documentation, prepare inspection release certificates, coordinate with clients and NDT contractors, and provide technical guidance throughout project lifecycle
NDT Coordination & Third-Party Testing Management
While visual inspection is the most common and cost-effective inspection method, many Perth projects require supplementary Non-Destructive Testing (NDT) to verify internal weld quality, detect subsurface defects, and satisfy regulatory requirements. Elite Engineering WA coordinates all NDT activities with NATA-accredited testing laboratories, ensuring seamless integration between visual inspection, NDT scheduling, and quality documentation.
NDT Methods We Coordinate
Radiographic Testing (RT): X-ray or gamma-ray examination for pressure piping, pressure vessels, and critical structural connections. Detects internal defects like porosity, lack of fusion, cracks, and slag inclusions. Essential for ASME, AS3992, and high-integrity applications in Perth's oil & gas sector.
Ultrasonic Testing (UT): High-frequency sound wave inspection for thick-section welds, structural steel connections, and areas where radiography is impractical. Provides real-time results, detects laminations and volumetric defects, and is safer than radiography (no radiation exposure). Common for Perth mining equipment and offshore structures.
Magnetic Particle Inspection (MPI): Surface and near-surface crack detection in ferromagnetic materials. Ideal for detecting fine cracks in structural steel, mining equipment wear plates, and fatigue-prone areas. Quick, cost-effective method for high-volume inspection work at Kwinana and Malaga workshops.
Liquid Penetrant Inspection (LPI): Surface crack detection for non-magnetic materials including stainless steel, aluminium, and exotic alloys. Essential for food processing equipment, marine applications, and chemical processing plant fabrication common in Perth's manufacturing sector.
Our NDT Coordination Services: We develop Inspection and Test Plans (ITP), coordinate NDT scheduling with fabrication progress, witness NDT activities to ensure proper technique, review NDT reports for technical compliance, resolve non-conformances identified by NDT, and compile all testing records for final MDR documentation.
Visual Welding Inspection

Visual welding inspection is the most fundamental and widely-used inspection method, performed on virtually every weld in Perth's mining, construction, and manufacturing sectors. Our AS1796-certified inspectors perform visual inspection per AS2214 standards, using calibrated inspection tools (weld gauges, magnification devices, measurement instruments) to assess weld quality against AS1554 acceptance criteria.
Visual Scanning is a preliminary assessment that verifies weld presence, general appearance, and gross defects. This rapid inspection method identifies obvious problems like excessive spatter, incomplete welds, major misalignment, or surface contamination requiring immediate corrective action.
Visual Examination is comprehensive surface inspection that assesses weld quality against specific acceptance criteria defined in project specifications and Australian Standards. Our certified inspectors check for surface imperfections including:
- Cracks: Most serious defect—zero tolerance per AS1554
- Lack of Fusion or Incomplete Penetration: Indicates inadequate heat input or incorrect welding procedure
- Undercut: Groove melted into base metal—common in structural steel fillet welds
- Shrinkage Grooves (Root Cavity): Depression along weld centerline in pipe welding
- Excessive Reinforcement: Overfill that creates stress concentration—critical for fatigue applications
- Excess Penetration: Protruding root in single-sided welds—affects flow characteristics in piping
- Linear Misalignment (Hi-Lo): Offset between joined plates—common in pipe fabrication
- Overlap (Overroll): Weld metal flowing onto base metal without fusion
- Toe Shape: Transition angle between weld and base metal—affects fatigue life
- Surface Porosity: Gas pockets indicating moisture, contamination, or shielding gas issues
- Weld Size (Dimensions): Throat thickness, leg length, and profile per drawing requirements
Our inspectors not only identify defects but also diagnose root causes and recommend corrective actions. Whether your project is in Forrestdale, Kwinana, or regional WA, Elite Engineering WA provides the technical expertise to ensure welding quality meets specifications. Contact us to discuss your visual welding inspection requirements.
Frequently Asked Questions
Welding inspection is a crucial process to evaluate the quality of a welded joint and make sure it meets required standards.
Here are the key points to keep in mind:
- Welding inspection is done to verify that the welded joint is properly formed and free of defects.
- It is essential for ensuring the safety and reliability of a structure.
The main aim of welding inspection is to verify that the joint meets the necessary standards and specifications.
Some important things to know:
- Welding inspection helps to ensure that the joint is free of defects that can impact the strength and stability of the structure.
- It verifies that the welding process was performed correctly, including proper preparation, welding technique, and post-weld heat treatment.
- Welding inspection helps to identify any defects or deviations from the required standards, allowing for corrective action to be taken.
The steps in welding inspection usually include:
- Review of design and welding specifications
- Visual inspection of the welded joint
- Radiographic inspection (x-ray or gamma ray)
- Ultrasonic inspection
- Magnetic particle inspection
- Liquid penetrant inspection
Here are some highlights:
- The first step is to review the design and welding specifications to ensure that the joint is being evaluated correctly.
- A visual inspection is performed to look for surface defects, such as cracks or porosity.
- Depending on the type of joint and the specifications, other inspections such as radiographic, ultrasonic, magnetic particle, or liquid penetrant may also be required.
Visual inspection is a simple method to evaluate the quality of a welded joint by examining the surface. Non-destructive testing (NDT) refers to a group of methods used to evaluate the quality of a welded joint without causing damage.
Here's what you need to know:
- Visual inspection is a straightforward method but can only detect surface defects.
- NDT methods such as radiographic, ultrasonic, magnetic particle, and liquid penetrant inspection, allow for the detection of subsurface defects.
- NDT methods are more complex and specialized, and often require trained personnel and specialized equipment.
The most common defects in welding include:
- Porosity
- Incomplete fusion
- Lack of penetration
- Cracks
- Excessive reinforcement
- Distortion
Here are a few things to keep in mind:
- Porosity refers to small holes or voids in the weld, which can weaken the joint.
- Incomplete fusion occurs when the weld metal does not completely fuse to the base metal, creating a weak point.
- Lack of penetration occurs when the weld metal does not reach the root of the joint, leaving the base metal unsupported.
- Cracks can occur in the weld or base metal and weaken the joint or cause failure.
- Excessive reinforcement occurs when the weld metal extends beyond the required dimensions, affecting the appearance and strength.
- Distortion can occur due to the heat of the welding process, causing misalignment or warping of the joint.
Need Visual Welding Inspection Services?
Get professional welding inspection and quality assurance services